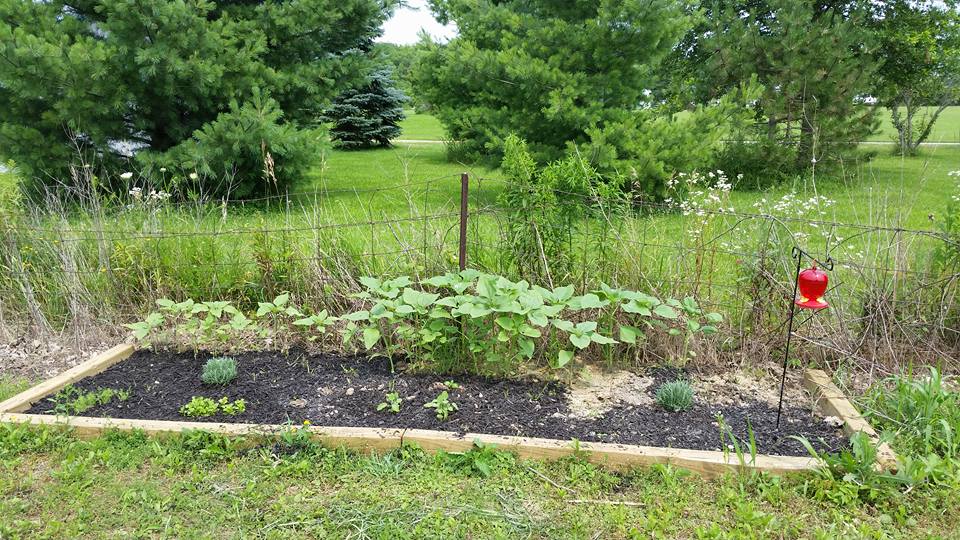
Well, the holiday weekend is past but I'm feeling pretty accomplished. Thankfully, the sun came out both Saturday and Sunday so I got to do some much needed landscaping. I also got to read the new E.L. James book Grey...Fifty Shades from Christian Grey's perspective. When we moved the house on this pretty piece of property three years ago, the land was grown up and rutted, but we have spent so much time redoing the house that there has been no time to do the lawn. This year, I decided I was going to make the yard pretty. But it's a work in progress because there are so many other things that I want to do. So far, I've hauled wheelbarrow load after wheelbarrow load of gravel to the front of the house where I planted some nice little shrubs and put my big concrete angel under the living room window, added a couple of pots of purple wave petunias to either side of the porch steps, hung a sweet potato vine from my heart shaped shepherd's hook by the drive, put some butterfly attracting perennials by the deck and some ground cover in the shady corner between the deck and the house. There's also my garden with a pair of adirondack chairs in the shady area to the side of it, my perennial garden filled with black eyed susans, purple coneflowers, shasta daisies, and hopefully my bulb plants will come up this year. This weekend I hope to find some time to make a HOPE, FAITH, and LOVE sign to add to the fence post in the middle of the perennials and a birdhouse to top it off. But my favorite little spot is the herb and sunflower garden by the fence. Sunflowers of all varieties to feed the birds, lavender, sage, parsley, basil, and dill alongside a little hummingbird feeder for those pretty little helicopter birds.
It was a lot of hard work, but well worth every minute, because even though I ached all over I felt a great sense of accomplishment. This weekend I am going to go buy some alfalfa and clover seed so that I can plant some deer forage for my tan visitors. I am hoping that every year I can add something new...you know...like fruit trees, pine trees, split rail fence, lilac bushes, berry bushes, grape vines, trumpet plants, and maybe even try my hand at a rose garden with a little bench in the middle.
As far as animals, maybe my miniature horse would like a buddy? And it would be nice to have chickens for eggs...I know that I've mentioned that I've gone pretty much totally organic over the last year and what better addition to all the other fresh things than fresh eggs?
I bought the Mother Earth News special edition magazine a couple of weeks ago about self-sustaining farms and they had a really good article on how to take an acre of ground and turn it into a self-sustaining farm. I have a little over three acres so I definitely should be able to do something similar. I can't wait until it's time to harvest my garden and can or freeze all the fresh food for winter. I already have a good start on the fruit harvest with 10 quart bags of red raspberries freshly frozen in the freezer. Tomorrow, I plan on going to my daughters and take a swipe at her wild raspberries to add to my collection. And as I drove home, I noticed that the wild elderberries are starting to come on so I will have to take a basket along in the car and load up on enough of them to make a batch of jelly to go along with the fresh bread I usually bake every weekend in the fall and winter. As soon as the orchard has some fresh peaches, I'm going to go get a bushel of them to make jam and freezer peaches for pies and cobblers this winter.
With the mention of cobbler and bread, I wanted to share my recipes for both with my readers:
Fruit Cobbler
Preheat oven to 350 degrees F.
Using a 9x11 rectangular baking dish, empty enough fresh fruit in the bottom to cover it well. For a thicker cobbler, just use a smaller dish!
In a separate bowl, mix 1 cup flour, 1 cup sugar, 1 cup milk and 1 tablespoon baking powder together until blended. For a rich treat, I like to substitute 1/4 cup of the milk for 1/4 cup of Amaretto. Pour the mixture over the top of the fruit and bake until the top is golden brown.
Basic Bread
This is the easiest bread that I have ever made but there are some tricks to baking bread that I didn't know until my best friend bought me a book on bread baking. (Truth is, he gets me these awesome cooking books and gadgets because I'm sure it's because he benefits too!) Trick #1-NEVER use the packages of yeast. I buy the jar of yeast now instead. Trick #2-NEVER mix in a plastic or metal bowl. I use a wooden spoon and a crockery bowl. Trick #3-ALWAYS put a cake pan of water in the bottom rack of your oven when baking to help keep the top moist enough for the bread to rise as it bakes.
Now...here's the ingredients:
3 cups of cold water in the crockery bowl-heat in the microwave or the oven until it's just lukewarm
Add 1 1/2 Tablespoons of yeast and 1 1/2 Tablespoons of Kosher salt
Allow both to dissolve by stirring with wooden spoon
Now, add 6 - 6 1/2 cups of flour and blend until it forms a nice, gooey ball.
Cover bowl with a clean damp cloth and put somewhere warm. Because my house is chilly in the winter time, I've found that putting the bowl in the laundry room on top of the dryer while I'm doing laundry works really well. Next winter I get to use the newest addition to my house...the rocket stove...which I'll tell you about another time.
Let the bread rise until it more than doubles.
Now, it's time to divide it up as this recipe makes two full sized loaves. I usually add a few extras...my favorite is to add about a half a handful of rosemary for some really nice flavor but I've also added sharp cheddar shreds and even walnuts or cranberries. Or you can just make it plain.
Put the dough into a well greased loaf pan (I prefer virgin olive oil) and then cover it again with a clean damp cloth and let it raise for about another 1-2 hours.
Now it's ready to bake! Bake at 350 degrees until it's golden brown on top and don't forget to put a pan of water on the bottom rack of your oven while the bread bakes.
I hope that you try and enjoy these recipes and I hope you all have a productive weekend!
 RSS Feed
